We made our own monitor for under $100!
0 up · 0 down · 0 ratings
Promos
Get iFixit's Pro Tech Toolkit now for only $59.99 USD at ifixit.com Save 10% and Free Worldwide Shipping at Ridge Wallets by using offer code LINUS at ridge.com Today we're going to show you how to build your own full HD IPS desktop monitor using spare parts and 3D Printing. It may not be a 144Hz 27" gaming display, but if you're looking for a little extra screen space for Discord or Spotify this little build just may fit the bill. Buy monitors on Amazon: geni.us Purchases made through some store links may provide some compensation to Linus Media Group. Discuss on the forum: linustechtips.com Our Affiliates, Referral Programs, and Sponsors: lmg.gg Get a VPN today with PIA at geni.us Get a Displate Metal Print at lmg.gg Get a 30-day free trial of Amazon Prime at lmg.gg Linus Tech Tips merchandise at lttstore.com Linus Tech Tips posters at crowdmade.com Our Test Benches on Amazon: amazon.com Our production gear: geni.us Twitter - twitter.com Facebook - @LinusTech Instagram - @linustech Twitch - twitch.tv Intro Screen Music Credit: Title: Laszlo - Supernova Video Link: youtube.com iTunes Download Link: itunes.apple.com Artist Link: soundcloud.com Outro Screen Music Credit: Approaching Nirvana - Sugar High youtube.com
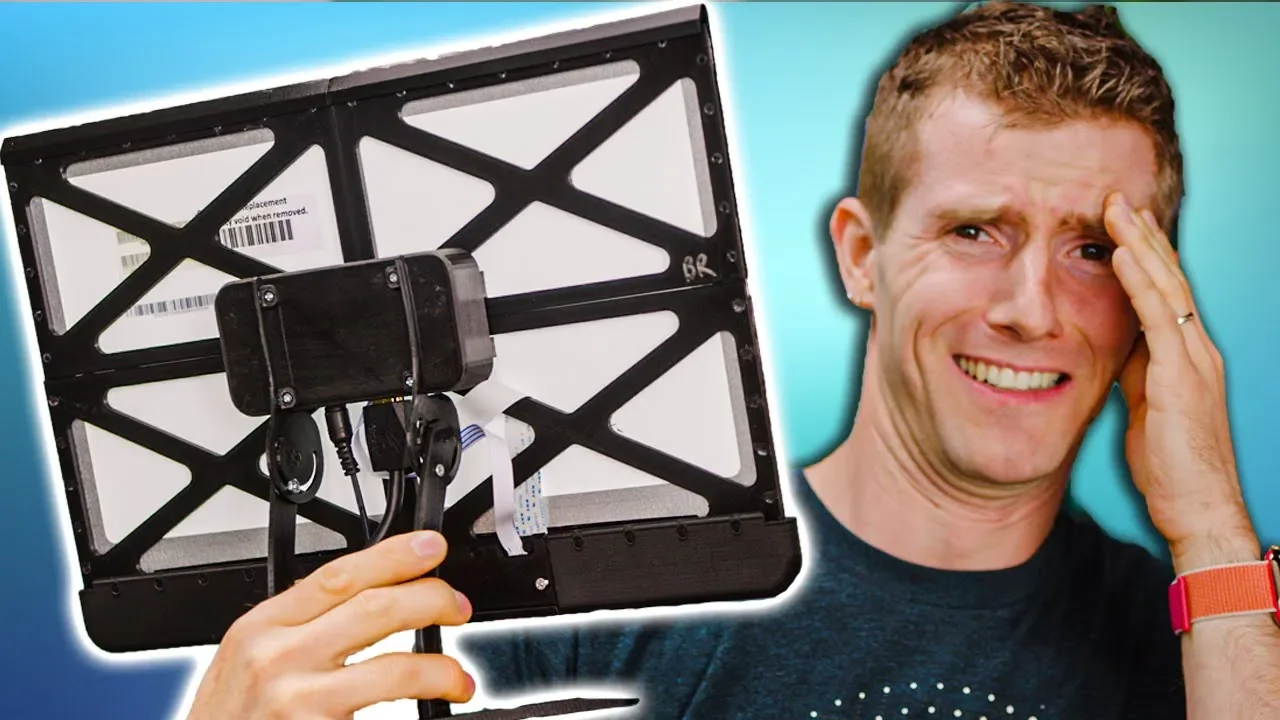
This video presents a practical, budget minded approach to creating a functional desktop monitor using a repurposed LCD panel and affordable hardware. The host explains that the goal is not to replace a high end gaming display, but to reclaim an old or surplus panel and give it a new life as a secondary or tertiary monitor. Early in the video, the concept is framed around reusing components from older devices and leveraging a cheap HDMI to display panel adapter to drive the LCD, highlighting the value of repurposing electronics rather than discarding them. The host emphasizes simplicity and accessibility, noting that all parts can come from local sources or online marketplaces and that with careful assembly the project can be completed by hobbyists without professional tooling. The narrative then shifts to practical assembly steps, including identifying the display connector, mounting a 3D printed frame, routing cables, and securing the EDp adapter, all while stressing the importance of gentle handling of fragile connectors. In the final portion, the assembled unit is tested, its display is adjusted using the on-screen menu, and the project is framed as a stepping stone to more elaborate ideas like a multi panel array or an in-desk display, underscoring the broader maker potential and encouraging viewers to try similar builds. The video wraps with a nod to ongoing projects and a sponsor mention, reinforcing that this is both a learning project and a showcase for budget friendly hardware experimentation. Overall, the video blends hands on demonstration with practical guidance, inviting viewers to experiment while managing expectations about performance and usability in a budget build.
Topics · hardware_hacking · diy · maker_community · consumer_electronics · education · technology_enthusiasts
Questions answered
- What components are essential to build a budget monitor from a laptop panel?
- A 1080p IPS panel, a compatible display adapter (EDP/HDMI to drive the panel), a frame or bezel, and some basic mounting hardware plus 3D printed or repurposed enclosure parts.
- Is this monitor intended to replace a gaming display?
- No, the video presents it as a secondary or tertiary display to gain extra screen space and for tasks like Discord or Spotify, not as a high refresh rate gaming monitor.