Personal Rig Update 2012 Part 6 - Cable Sleeving Showcase & Guide Linus Tech Tips
0 up · 0 down · 0 ratings
Description
OMG it's here! Cable sleeving (semi) tutorial and another update about my machine upgrade that's turned from a simple "drain and refill with new hardware attached" to a full-blown re-build! CA: ncix.com US: us.ncix.com This is the power supply I'm using based on Seasonic's BEAST 1000W 80PLUS Platinum paltform, and with XFX legendary support and great aesthetic.
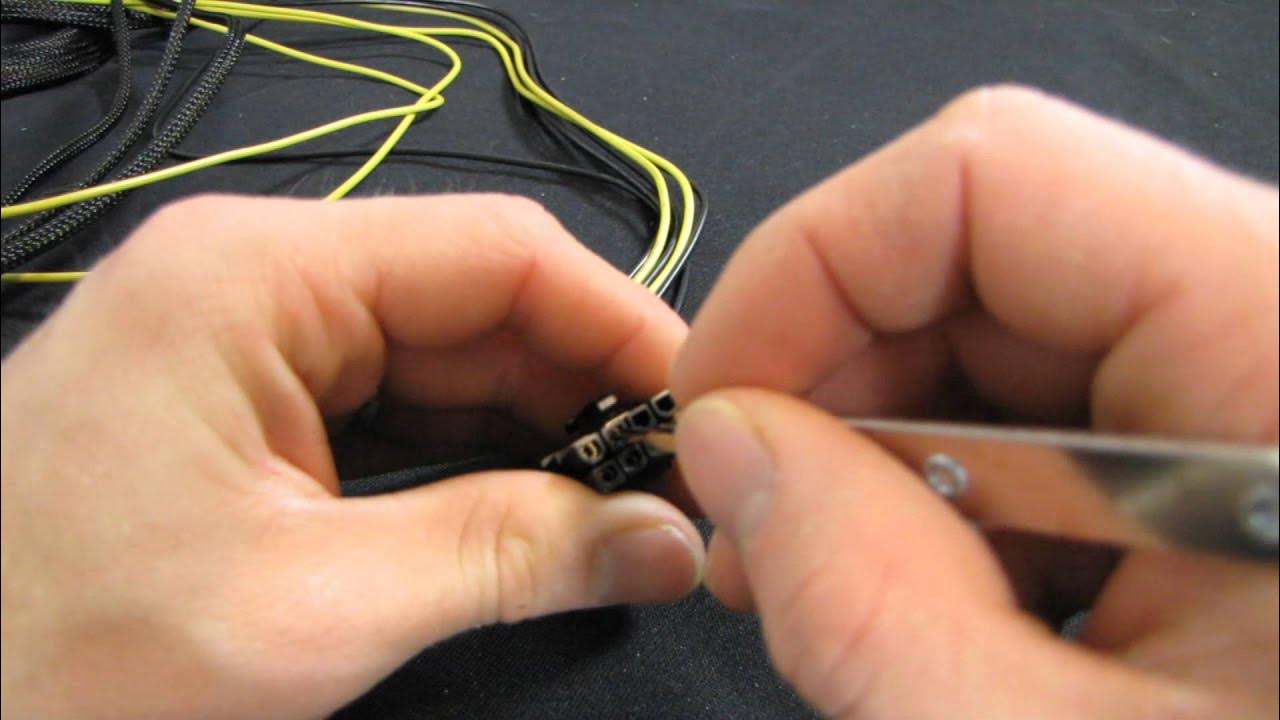
The video opens with an overview of the common approaches to cable sleeving for a PC build, highlighting the two main methods: finishing with heat shrink and exposed wires, or using individually sleeved wires for a cleaner, more custom look. The creator weighs the pros and cons of pre-made extensions, noting potential efficiency losses in connectors and longer cables, and acknowledges that many enthusiasts favor individual sleeving for aesthetics. He then announces his chosen approach for this build, which is influenced by having spare sleeving and heat shrink on hand, and proceeds to explain how he will sleeve two wires per cable for a balance of appearance and practicality. Along the way he discusses the challenges of mismatched pin counts on the power supply, the use of a Molex removal tool, and the importance of careful handling to avoid damaging pins. The guide expands into practical steps for removing existing sleeving, preparing cables, routing them through sleeving, and applying heat shrink, with notes on safety and technique. He also points to a more formal, by-the-book method from a HardForum thread by Ka Master for readers seeking the optimal result, while offering a quicker, looser version in his own tutorial. In conclusion, the video covers finishing touches such as masking tape, heat shrink orientation, and final testing to ensure the sleeved cables stay in place without stressing the connectors, effectively presenting a lazy-man’s but functional approach to cable sleeving.
Topics · Technology · DIY · Hardware · Computation · Hardware-modding
Questions answered
- What are the two main cable sleeving approaches discussed in the video?
- The video outlines two main approaches: using heat shrink with wires exposed at the end, and using individually sleeved wires for a fully braided, clean look.
- What are the tradeoffs of using premade sleeved extensions?
- Premade sleeved extensions can look good and save time, but they may reduce efficiency in the connectors and add length to cables, which can complicate routing.
- What tool is demonstrated for removing Molex or similar connectors in the sleeving process?
- A dedicated connector removal tool (Molex/peripheral removal tool) is used to compress pins on each side so wires can be pulled out without damaging the housing.
- What is Linus’s recommended approach for someone wanting decent results quickly?
- He suggests a pragmatic approach of sleeving two wires per cable and using thicker sleeving to hide the wires while keeping the process relatively simple, rather than following the most meticulous, textbook method.