My new favourite craft! - AK-V Tufting Gun
0 up · 0 down · 0 ratings
Description
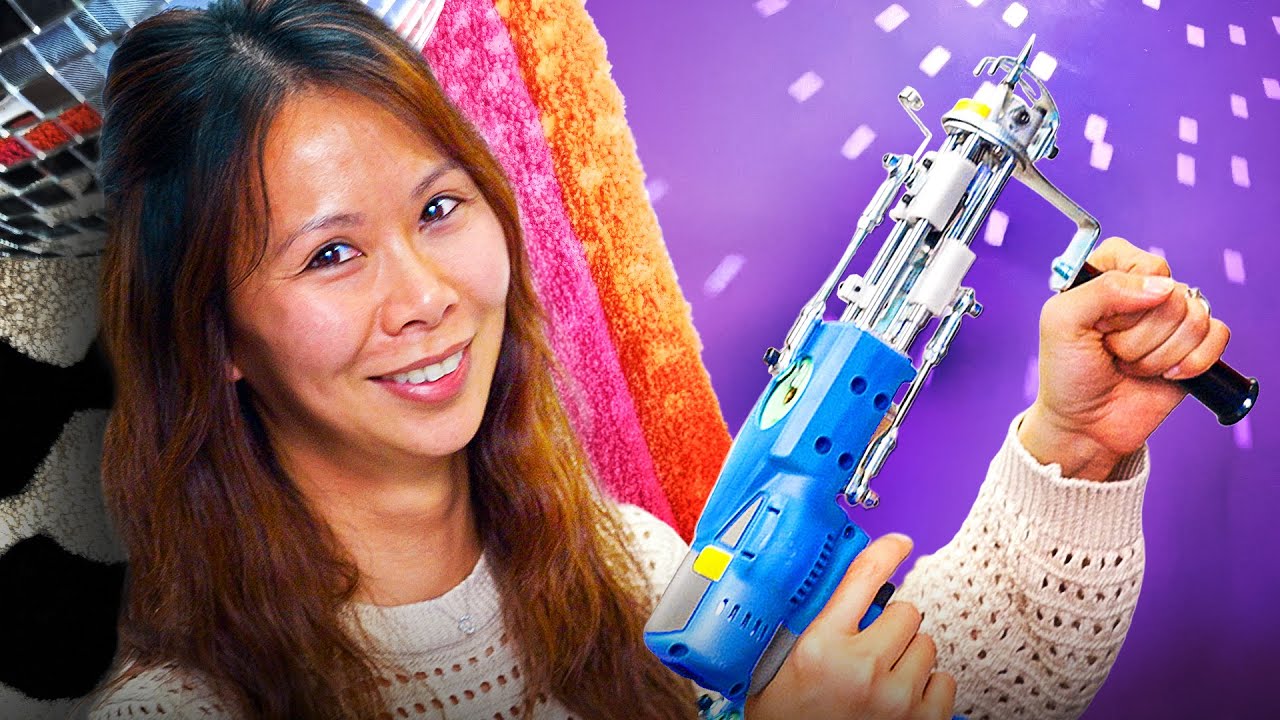
Step confidently into daily life with the ultra-light Vessi Pacific Sneaker. Vessi claims they are fully waterproof, and they come with a 1-year warranty with 30-days of worry-free returns. Get 15% off your first pair at vessi.com at checkout! Tufting rugs is the new hot craft. You get to use a cool gun, big scissors, and end up with a new fuzzy friend at your keyboard or feet; but it sure does seem complicated... Fret not! Yvonne and Reece are here to show you that this new trend is easier than it seems, especially when using the AK-V cut and loop tufting gun.
Promos
Check out the AK-V Cut and Loop Tufting Gun: lmg.gg Purchases made through some store links may provide some compensation to Linus Media Group. Want us to unbox something? Make a suggestion at lmg.gg ► GET MERCH: lttstore.com ► GET A VPN: piavpn.com ► GET EXCLUSIVE CONTENT ON FLOATPLANE: lmg.gg ► SPONSORS, AFFILIATES, AND PARTNERS: lmg.gg Linus Sebastian is an investor in Framework Computer, Inc CHAPTERS --------------------------------------------------- 0:00 Intro 0:54 What's in the Tufting kit and how it works 3:08 Setting up the frame and materials 5:22 Preparing your design and projector setup 7:10 Learning to tuft and adjusting speed 7:55 Sponsor 8:28 First test tufts 10:16 Improving technique and adjusting height 12:37 Final touches, carving, and finishing steps 15:48 Credits
The video presents an in-depth, practical introduction to tufting rugs using the AK-V Cut and Loop Tufting Gun. It begins with an overview of the motivation behind tufting as a trendy craft and how the gun and accompanying kit enable home-based rug production. The presenters walk through the initial unboxing, identifying the main components such as the frame, gun, power supply, and the specialized scissors, while noting the digital speed readout built into the gun as a helpful feature for managing pace on larger projects. The tone stays approachable, aiming to demystify the gear and show that a high-quality tufting setup can fit into a relatively compact workspace. The segment emphasizes how the project can start small and scale up, stressing the importance of a taut frame and a traced image to ensure clean lines and reliable results. The episode also teases the finishing options, including carving and backing, to add depth and durability to the finished rug. In the setup portion, the video digs into frame assembly, fabric selection, and frame sizing, underscoring how polyester-based backings resist tearing and maintain tension. The hosts demonstrate matting a fabric onto a large frame, then explain why a projector helps trace precise designs rather than freehand drawing. They also discuss practical considerations like reversing the image so the front prints on the correct rug side and ensuring ample behind-space for the tufting action. A key aside compares frame sizes from different vendors, highlighting how a larger frame can improve stability for bigger projects while acknowledging that smaller spaces can still yield satisfying results. The discussion this far lays a strong foundation for beginners, including tips on fabric choice, yarn density, and how two strands increase tuft density and affect processing time. The core technique is explored in detail as they begin tufting a sample design. They cover the basics of loading the gun safely with the machine off, choosing a slower speed for accuracy, and using vertical lines to minimize errors. The hosts note that speed is adjustable via a dial, and that denser tufting can cause curling if pushed too far; thus practice and trial-and-error are recommended. Throughout, they compare real-time adjustments like height changes, needle depth, and row spacing, and demonstrate how to adjust the bar to alter tuft length. The video also sheds light on real-world pacing, with measured progress around 2,000 RPM at the start and occasional bursts to test max speed, all while emphasizing control and ergonomics for longer sessions. By the end of the tufting section, viewers can see the progression from a rough shape to a neater, more complete edge and interior lines. In finishing, the presenters outline post-tufting steps such as applying backing glue, cutting out the rug shape, and optional carving to create depth and emphasis along edges. They demonstrate a basic carving technique to introduce depth and a more tactile surface, then show how carving can emphasize curves or lines that the tufting alone leaves flat. A quick pricing snapshot is provided, noting that the full kit runs around 400 USD and professional-grade machines can be substantially more expensive, with the caveat that beginners can accomplish compelling results at a lower cost. The episode closes with encouragement to practice, start small, and gradually refine technique, plus a nod to potential future topics in niche tech crafts. Overall, the video blends hands-on demonstration with practical tips to empower viewers to try tufting at home while delivering entertaining, user-friendly commentary from Yvonne and Reese.
Topics · crafts · diy · technology · hobby
Questions answered
- What is included in the AK-V tufting kit and what does each piece do?
- The kit includes a tufting frame, the AK-V gun, power supply, coupling components, and specialized scissors. The frame keeps fabric taut for consistent tufting; the gun drives yarn through the fabric to form loops or cut pile; the power supply controls the gun’s operation; and the scissors are used for shaping and carving details after tufting.
- How should a beginner approach starting a tufting project?
- Start with a small design and a manageable frame size, ensure the fabric is taut, use a projector to trace a clean image, and practice at slower speeds. Outline the design first and then fill in with vertical lines to maintain straightness. Glue the finished rug backing and consider carving for depth as a finishing step.