Mineral Oil Submerged PC Build Log Part 2 - Assembling the Components
0 up · 0 down · 0 ratings
Channels and socials
It's mineral oil PC time again - this time around Linus and Luke assemble the components and install them in the case. Sponsor link: linustechtips.com Pricing & discussion: linustechtips.com Support us: linustechtips.com Join our community forum: bit.ly twitter.com @LinusTech Intro Screen Music Credit: Adhesive Wombat -
Check out his channel here: youtube.com Approaching Nirvana - Not Even Once youtube.com Approaching Nirvana - 64 So Close youtube.com Outro Screen Music Credit: Approaching Nirvana - Sugar High youtube.com
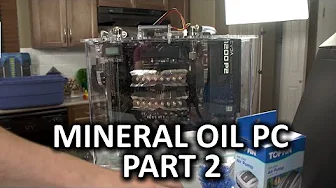
Part two of the Mineral Oil Submerged PC Build Log focuses on assembling the PC components and preparing the chassis for the mineral oil tank. The hosts outline the plan to mount all hardware to the back of the tank and discuss why they chose a compact approach, highlighting the EVGA MATX X99 motherboard and the desire to avoid a bulky, immovable oil tank. They explain the need to remove rubber port covers and other non-essential components from the motherboard before submerging, and they check magnetic parts trays to keep hardware organized and safe. A major portion of the discussion centers on power supply placement, with the team opting to mount it at the top to make lifting the completed system easier and to free space in the tank area. They also address the complexity of cable management, noting the necessity of careful routing for the temp sensor power and other connections so that the build remains tidy and functional when powered. The hosts evaluate the hardware fit, describing the physical clearance around the graphics card and the posibility of “graphics card surgery” to accommodate the card inside the tight enclosure, a moment that underscores the unconventional nature of oil-cooled builds. Throughout, there is a blend of practical testing steps and light-hearted banter, including discussions about LED lighting and aesthetic considerations to ensure the final visual impact matches the performance-focused goals. By the end of this segment, they prepare for a post-build test cycle, emphasizing the importance of verifying the system sans oil to avoid pump damage or CPU overheating, and recounting small lessons learned from prior builds to improve the workflow. The overall tone combines hands-on problem solving with a sense of humor about the quirks of assembling a high-end, oil-immersed PC, setting the stage for the upcoming final steps of filling and running the tank.
Topics · technology · computers · hardware
Questions answered
- What motherboard and form factor did the builders choose for the mineral oil PC, and why?
- They selected an EVGA MATX X99 motherboard to balance performance with a compact form factor, aiming for a setup that would fit inside the oil tank without becoming impractically large and hard to move.
- Why did the presenters remove port covers and other nonessential elements from the motherboard before submerging it?
- To prevent components that could trap liquids or cause issues from remaining in the submerged environment, ensuring better reliability and easier maintenance inside the tank.
- What precautionary steps did they take before plugging in the pump or powering the system during testing?
- They performed a post build test with no oil and left the pump unplugged to prevent running dry and potential damage, and they confirmed the CPU was powered correctly by solving a post code issue related to a loose CPU power connector.